How To Setup PCSX2 and Download PS2 Bios
Here’s how you can set up PCSX2 and download the PS2 bios:
Similar: How to Install Zenless Zone Zero in Steam Deck (With Pictures)
Step 1: Install 7-Zip
- Visit 7zip.org and download 7-Zip. This software is necessary for extracting the emulator and BIOS files.
- Install 7-Zip on your computer by following the on-screen instructions.
Step 2: Download PCSX2 Emulator
- Navigate to pcsx2.net, the official PCSX2 website.
- Go to the “Downloads” section and choose the “Latest Nightly” version appropriate for your operating system (Windows x64, Linux, macOS).
- Download the PCSX2 emulator to your desktop or preferred download location.
Step 3: Acquire PS2 BIOS Files
- The BIOS files are necessary for the emulator to function correctly which you can download from emu-land.net or any other website you trust.
- Once located, download them to your desktop or another suitable location.
Step 4: Extract BIOS and PCSX2 Files
- Locate your downloaded PS2 BIOS zip file. Right-click on it, navigate to 7-Zip in the context menu, and select “Extract here” or “Extract to <folder>” depending on your preference.
- Repeat the extraction process for the PCSX2 zip file.
- After extracting, you can delete the original zip files to declutter your workspace.
Step 5: Setup PCSX2 Emulator
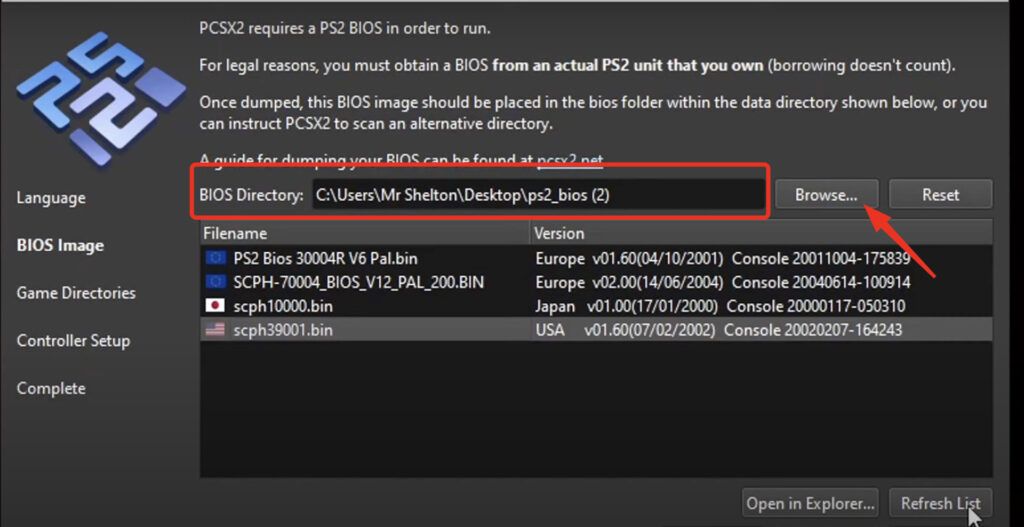
- Open the extracted folder for PCSX2 and run the emulator’s executable file.
- A setup wizard will launch. Keep the default language or choose your preferred language.
- You can stick with the default or select another from the available options for the theme.
- When prompted to select a BIOS, click “Browse” and navigate to the extracted BIOS folder, select it, and then choose the BIOS version you wish to use (Japan, USA, Europe).
- Click “Next” to continue and configure additional options as desired.
Step 6: Add PS2 ROMs to PCSX2
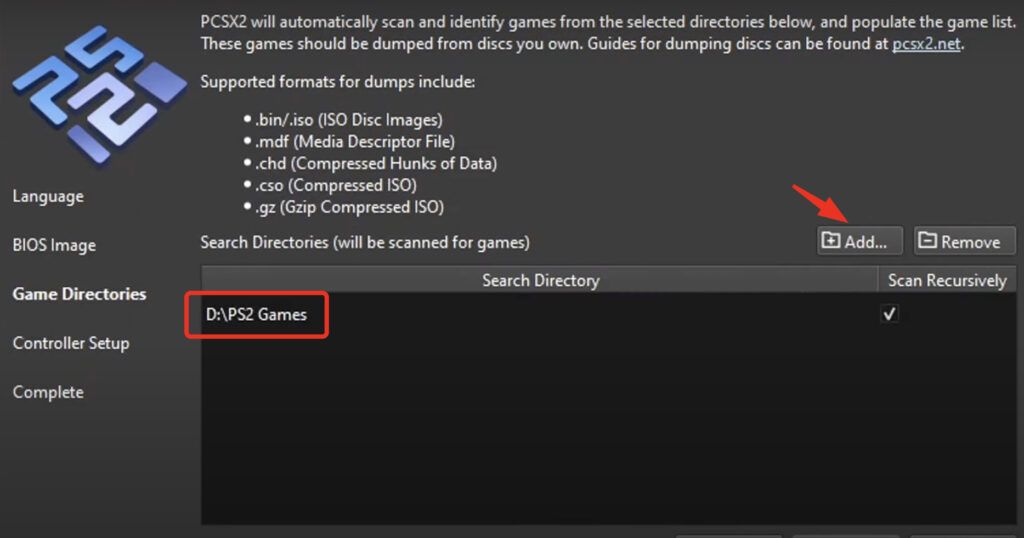
- To add games, click on “CDVD” > “ISO Selector” > “Browse” in the PCSX2 emulator.
- Navigate to where you’ve stored your PS2 ROMs (game files), which must be in ISO format. Select the folder containing your games.
- The games will now be available through the emulator.
Step 7: Controller Configuration

- PCSX2 will automatically map controls for recognized controllers, like the Xbox One controller. If needed, manual configuration is available through “Config” > “Controllers (PAD)” > “Plugin Settings.”
Step 8: Configure Graphics Settings
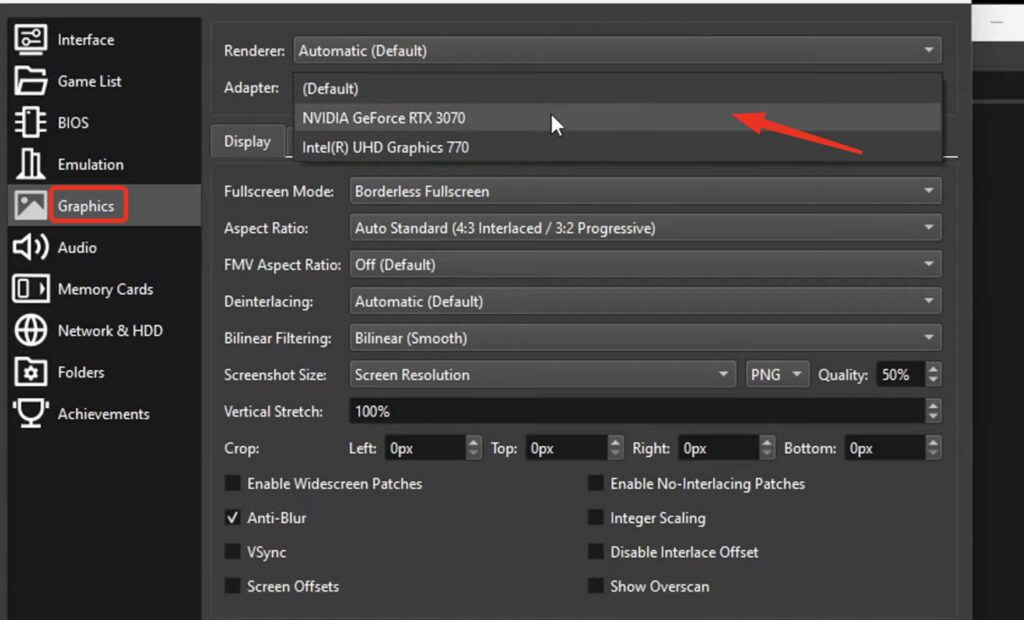
- Go to “Config” -> “Video (GS)” -> “Plugin Settings.”
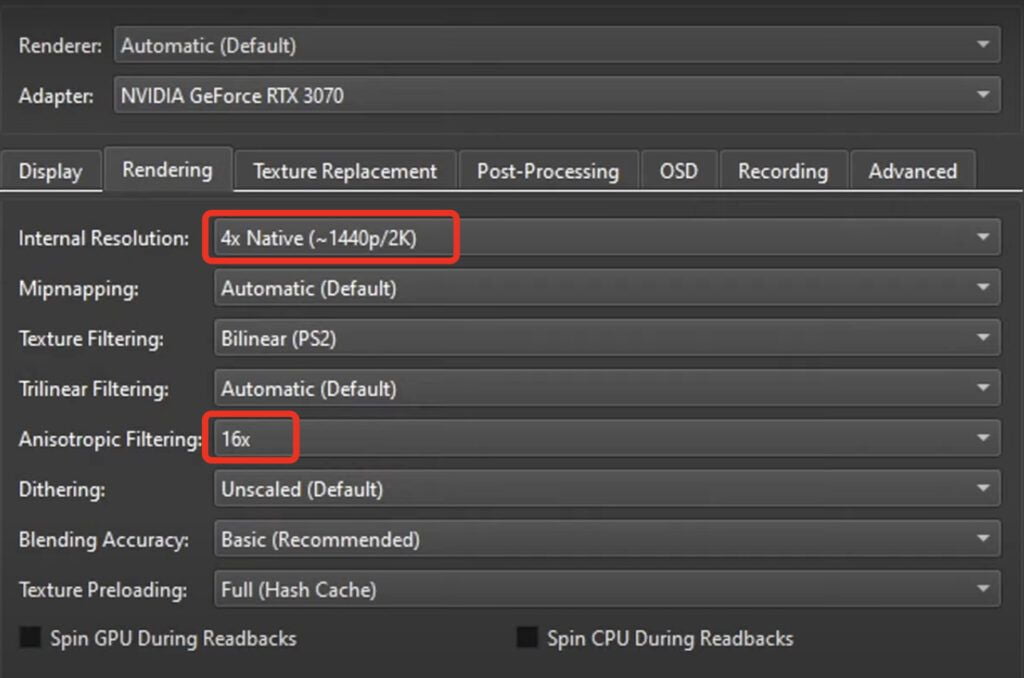
- Choose your desired renderer and adapter (use a dedicated graphics card if available).
- Adjust the aspect ratio and other settings according to your preferences for optimal game performance and appearance.
Step 9: Saving Games

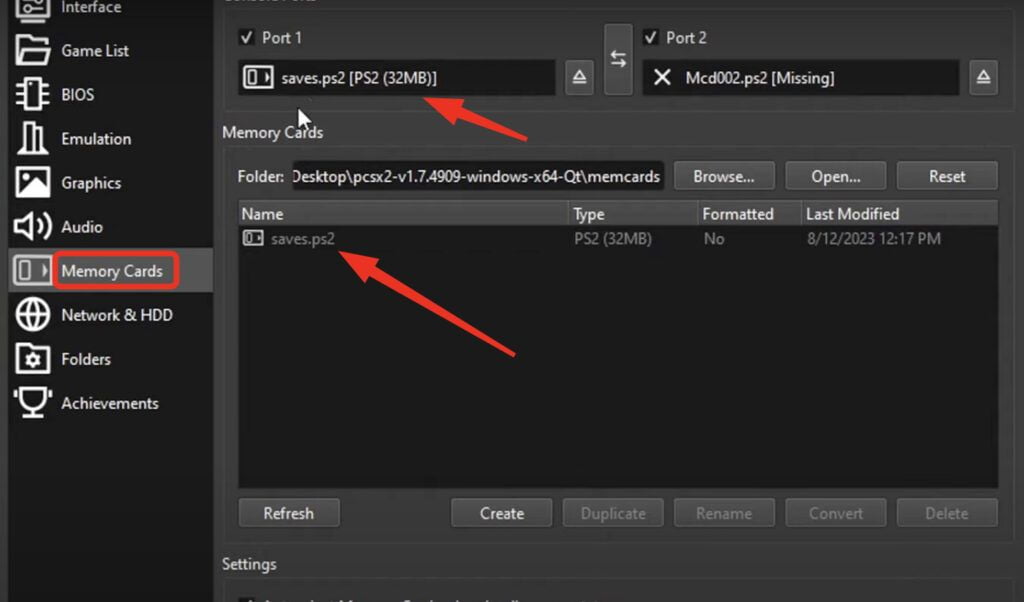
- Navigate to “Config” -> “Memory Cards” to create and assign memory cards for saving game progress.
- Click “Create” and select the memory card size. Name your memory card and click “OK.”
- Assign the memory card to the desired slot.
Additional Tips:
- For a seamless experience, consider setting PCSX2 to start games in full-screen mode.
- Explore and adjust hotkeys for quick access to emulator features.
- Ensure all your PS2 ROMs are in ISO format. Use 7-Zip to extract or convert files as needed.
Similar: How to Play Wuthering Waves in Steam Deck?
And that’s it! You’ve successfully set up PCSX2 and are ready to enjoy PS2 games on your computer. Remember, downloading games you don’t own is illegal, so use the emulator responsibly.

