How to Play Wuthering Waves in Steam Deck?
Here is a complete guide on how to set up Wuthering Waves on your Steam Deck using SteamOS gaming mode:
Similar: How to Play Wuthering Wave on Mac using MuMu/PlayCover
Prerequisites
- Steam Deck with SteamOS updated to the latest version.
- Internet Connection – Ensure you have a stable connection for downloading the game and necessary files.
- Storage Space – Make sure your Steam Deck has enough space for the game installation and additional files.
Step-by-Step Guide
Step 1: Downloading the Installer
- Boot into Desktop Mode on your Steam Deck.
- Open your web browser and use the Steam Deck on-screen keyboard (activate by pressing Steam + X) to search for “Wuthering Waves”.
- Navigate to the official game website and download the Windows installer for Wuthering Waves.
Step 2: Adding the Game to Steam
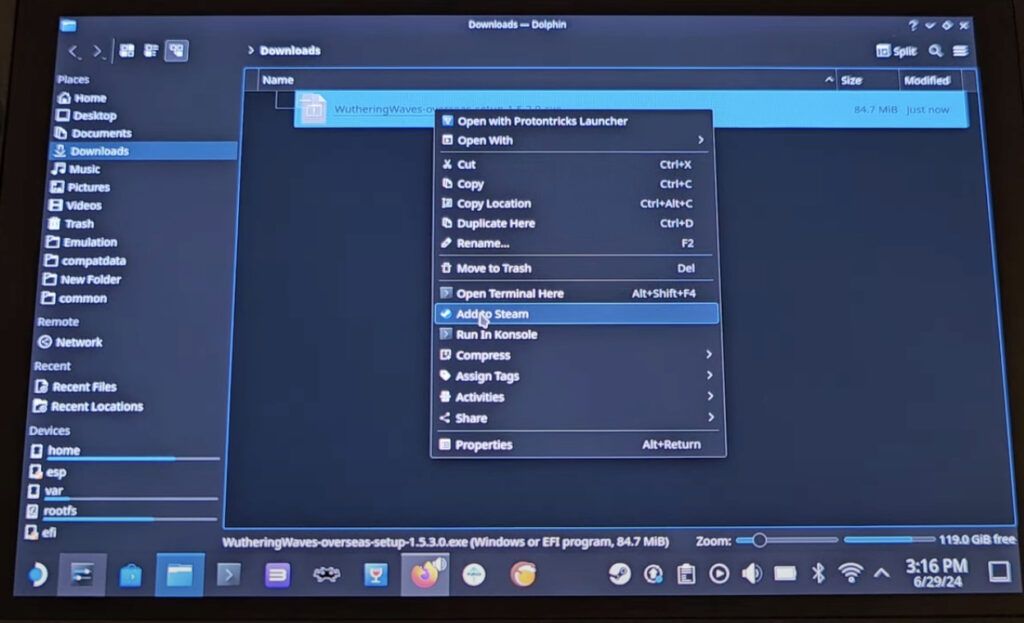
- After downloading, locate the installer file in your Downloads folder.
- Right-click on the Wuthering Waves installer and select Add to Steam.
- In Steam, find the installer in your library and add it to your favorites for easy access.
Step 3: Setting Up Proton
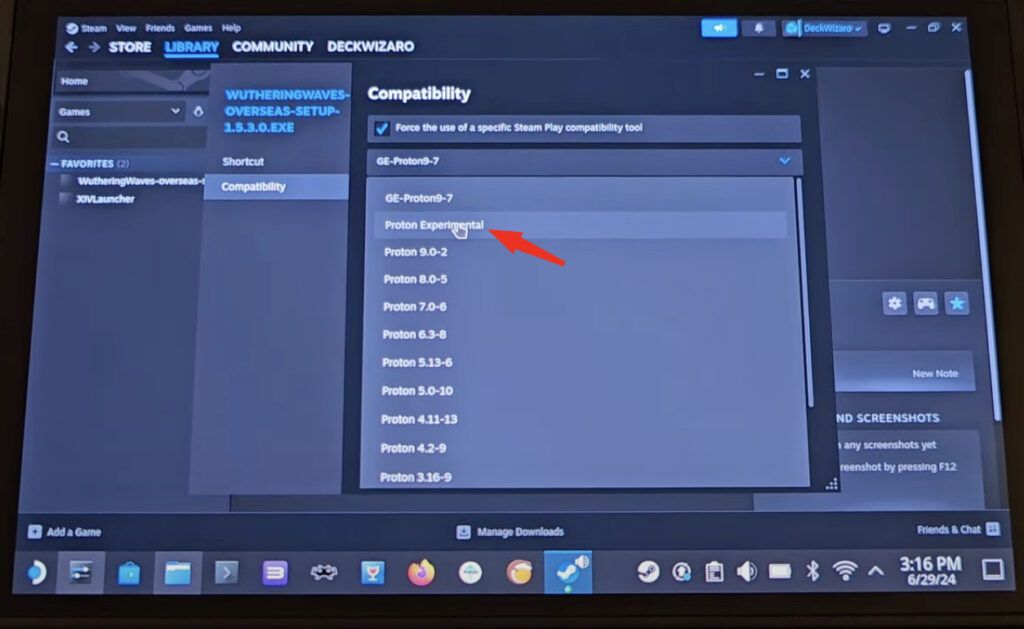
- Right-click the game in Steam, go to Properties, then Compatibility, and set it to use Proton Experimental.
Step 4: Locating the Installation Folder

- Minimize Steam and open the Home Folder, and ensure “Show hidden files” is checked.
- Navigate to:
~/.steam/steam/steamapps/compatdata. - Stay in this folder but switch the view mode to details and sort by the “modified” date to find the latest folder created.
Step 5: Launching the Installer
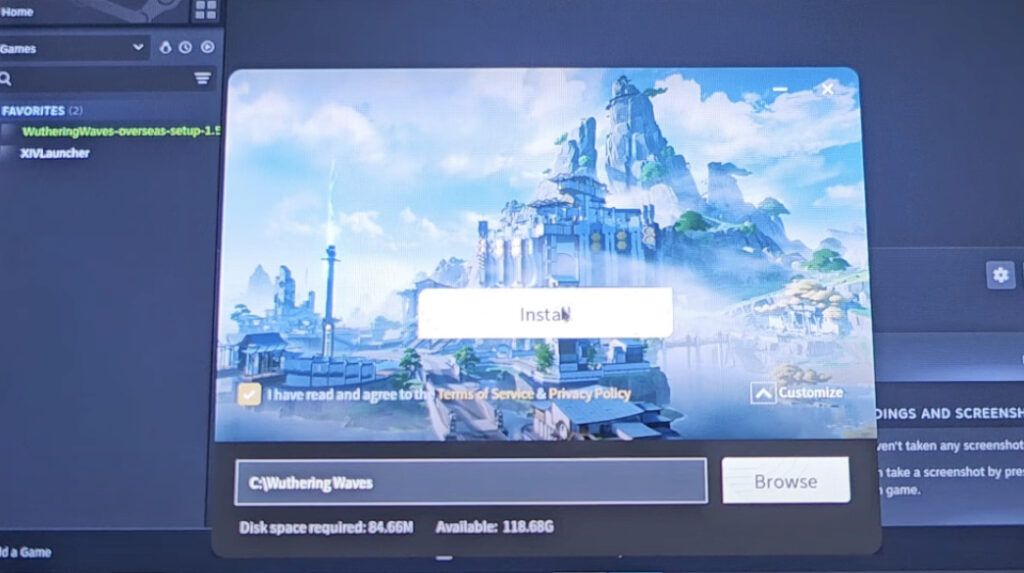
- Return to Steam and launch the Wuthering Waves installer.
- Agree to the terms, ensure your path is set to the default C drive location, and install the initial client. Do not launch the game post-installation.
Step 6: Adjusting the Launch Options
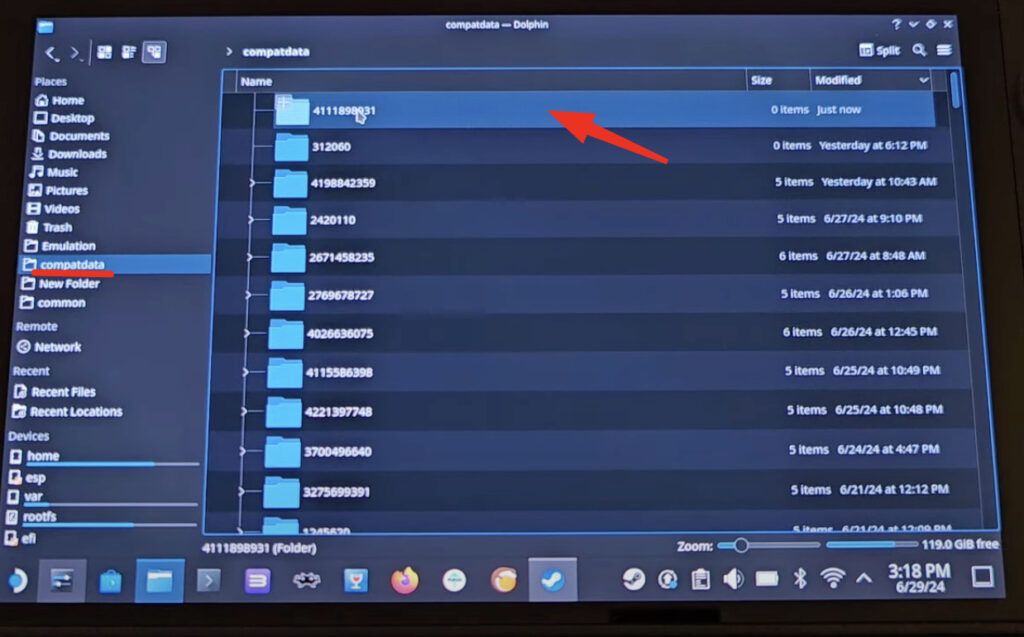
- Return to the
compatdatafolder.- Locate the new folder and find the path to the executable
pfx/drive_c/Wuthering Waves/launch.exe.
- Locate the new folder and find the path to the executable
- Copy the full path of
launch.exe. - Back in Steam, under the game’s properties, modify the Target and Start In fields with the copied path, removing
launch.exefrom the latter.
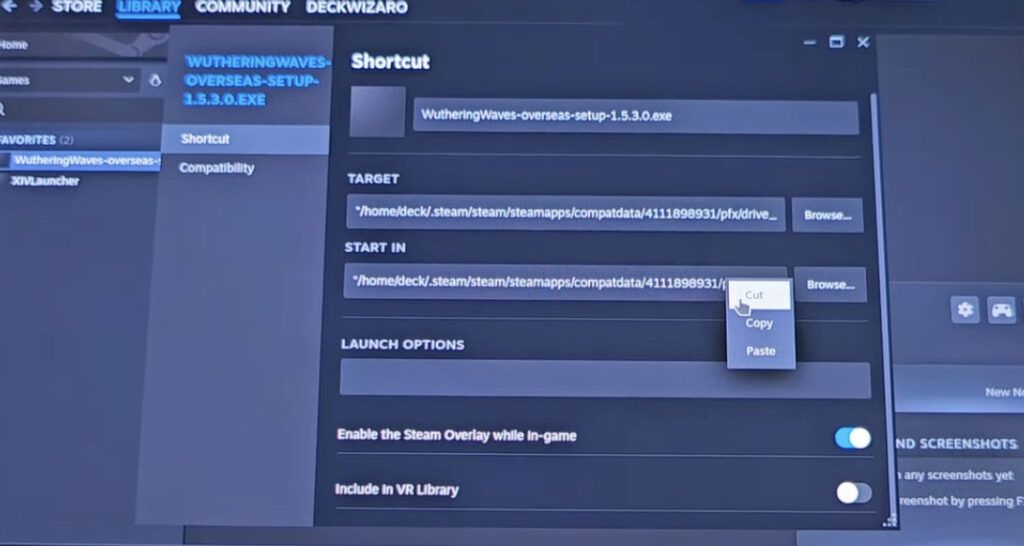
Step 7: Renaming the Shortcut

- In Steam, change the name of the shortcut to “Wuthering Waves” for clarity.
Step 8: Finalizing Installation
- Launch the game through Steam. The launcher will begin downloading the full game.
- Once downloaded, start the game. The first launch might prompt additional downloads or restarts.
Step 9: Setting Up Cover Art and Further Customization
- Return to Desktop Mode and visit
deidox.xyzto download and install Dei, which allows for customization like cover art. - Follow the installation instructions, select the relevant version (stable or pre-release), and once installed, return to gaming mode to access Dei, and optionally download the Steam Grid DB for more artwork options.
Step 10: In-Game Settings Optimization
- Once in the game, navigate to settings:
- Set graphics to very low and adjust the frame rate cap (30, 45, 60).
- Enable FSR to improve performance.
- Experiment with settings and share in the game community for optimal configurations.
Conclusion
Now that Wuthering Waves is set up on your Steam Deck, you should explore its beautiful world, complete quests, unlock rare resonators, echo, and weapons to reach the highest union level.
If you experience any crashes, follow the standard procedure: restart the game or adjust compatibility settings.
This setup will ensure you have a smooth experience playing Wuthering Waves on your Steam Deck. If you encounter any issues or have questions, feel free to comment down below.


![Rover Havoc Skill Priority Guide [2024]](https://gginsiders.com/wp-content/uploads/2024/08/Rover-Havoc-768x431.jpg)

